How to Build the Walk-in Shower of Your Dreams
Avoiding Shower Remodeling Nightmares
Walk-in showers are a great way to modernize your bathroom and boost your home’s overall resale value. No surprise, then, that many homeowners are looking to remodel their shower into a walk-in.
Remodels come at a price, though. Building a shower could cost $6,000 or more depending on the size and materials, and if you don’t do it right, you could be throwing your money down the drain.
That’s why we’re offering you tips on how to build a shower. We’ll cover everything from how to plan the remodel to, most importantly, how to waterproof your shower to avoid thousands of dollars in water damage repairs.
Planning a Shower Remodel

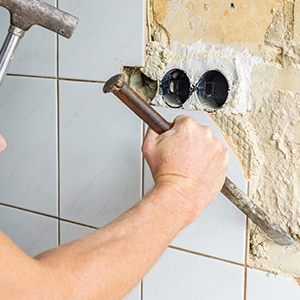
When it comes to installing a walk-in shower, especially if you’re converting from a tub/shower combo, there’s no going halfway. It’s going to be a gut remodel down to the wall studs. Be prepared to rip out all the old tile and board and remove the tub.
If you also want to change the location of your plumbing fixtures, that adds significantly more work and expense to the project. The same goes if you want to expand your shower—you will need to adjust your wall framing.
But don’t rip anything out until you have a solid plan for what will replace it. Some people hire a designer and/or architect to develop a plan. To help get you started, we’ve developed a checklist for planning a walk-in shower.
Once you have planned your new shower and demolished your old one, it’s time to start building.
How to Waterproof a Shower
The reality is, if you don’t properly waterproof your shower, you are condemning your bathroom to leaks, mold growth, and structural damage
Fortunately, modern waterproofing has been vastly simplified with the development of walk-in shower kits, such as those made by Schluter. These kits provide waterproof boards, membranes, and trays for complete moisture protection.
Waterproofing Shower Kits
The traditional way to waterproof a shower is to install cement board and cover it with a liquid or sheet membrane. Of course, cement board is heavy to work with and messy to cut. Not to mention all the work applying the membrane across the entire board.
A Schluter shower system provides everything you need to waterproof a shower without as much work or mess. Its waterproof KERDI Board is installed right over the shower wall studs. Since the board itself is waterproof, you do not have to apply the membrane to the entire thing.
Next, Schluter makes the waterproof KERDI prefabricated shower tray, which you apply right over the subfloor with unmodified thin-set mortar. A variety of additional KERDI products are available including a shower drain, prefabricated shower curb, shower bench, and even ramps and other transition options if you opt for a curbless shower. How many of these products you end up using will depend on your overall shower remodel plan.
Once you’ve installed the waterproof boards and tray and sealed any seams or gaps with a membrane, you are ready to lay tile.
Tiling and Finishing Your Shower
The two main questions to answer before tiling your shower are:
- What type of tile should I use?
- What type of grout should I use?
Choosing a walk-in shower tile involves a mix of style and practicality decisions. For example, if you want a spacious feel with easier cleaning, then large tiles are the way to go. If you want greater slip-resistance and smoother slopes along benches and ceilings, then go small. You can also compromise and cover the floor with large tiles and the walls with small tiles.
Ceramic, porcelain, stone, and glass are all possible tile materials but, again, it depends on your priorities. Consider style, scratch-resistance, slip-resistance, water-resistance, durability, and cost when making your decision. Keep in mind that larger tiles will be quicker to install (you’ll need fewer).
Once you lay your tile over the waterproofing membrane with mortar, you will need to apply grout between the tiles. When choosing grout, you need to decide between sanded and unsanded type and on what color to use.
Sanded grout is less expensive and offers more color choices but can scratch sensitive tile and needs to be water-sealed. Unsanded grout is easier on sensitive tiles and more water-resistant, but more expensive.
Grout color choice depends on your intended design. Having the same grout color as the tile will make the rest of your bathroom stand out at the expense of the floor. On the other hand, having black grout with white tile will make the floor pop. One other thing—if you pick a lighter grout, it will collect visible dirt very easily, so be prepared for more frequent cleanings.
Once you have tiled and grouted your new walk-in shower, the last step is to install the fixtures—showerhead, nozzles, etc. and a glass enclosure to keep water from spraying out.
Enjoy the Shower of Your Dreams
Proper planning, waterproofing, and tiling will ensure you can enjoy the walk-in shower of your dreams for years to come. You’ll not only boost your home’s resale value but become an example for your friends and family to follow in their own remodels.
If you have any questions about remodeling your shower, especially regarding waterproofing, please give our experts a call at 1 (866) 554-4328.
